
How to Make a Gaffi Stick
- Brittany Kolb

- Nov 18, 2023
- 6 min read
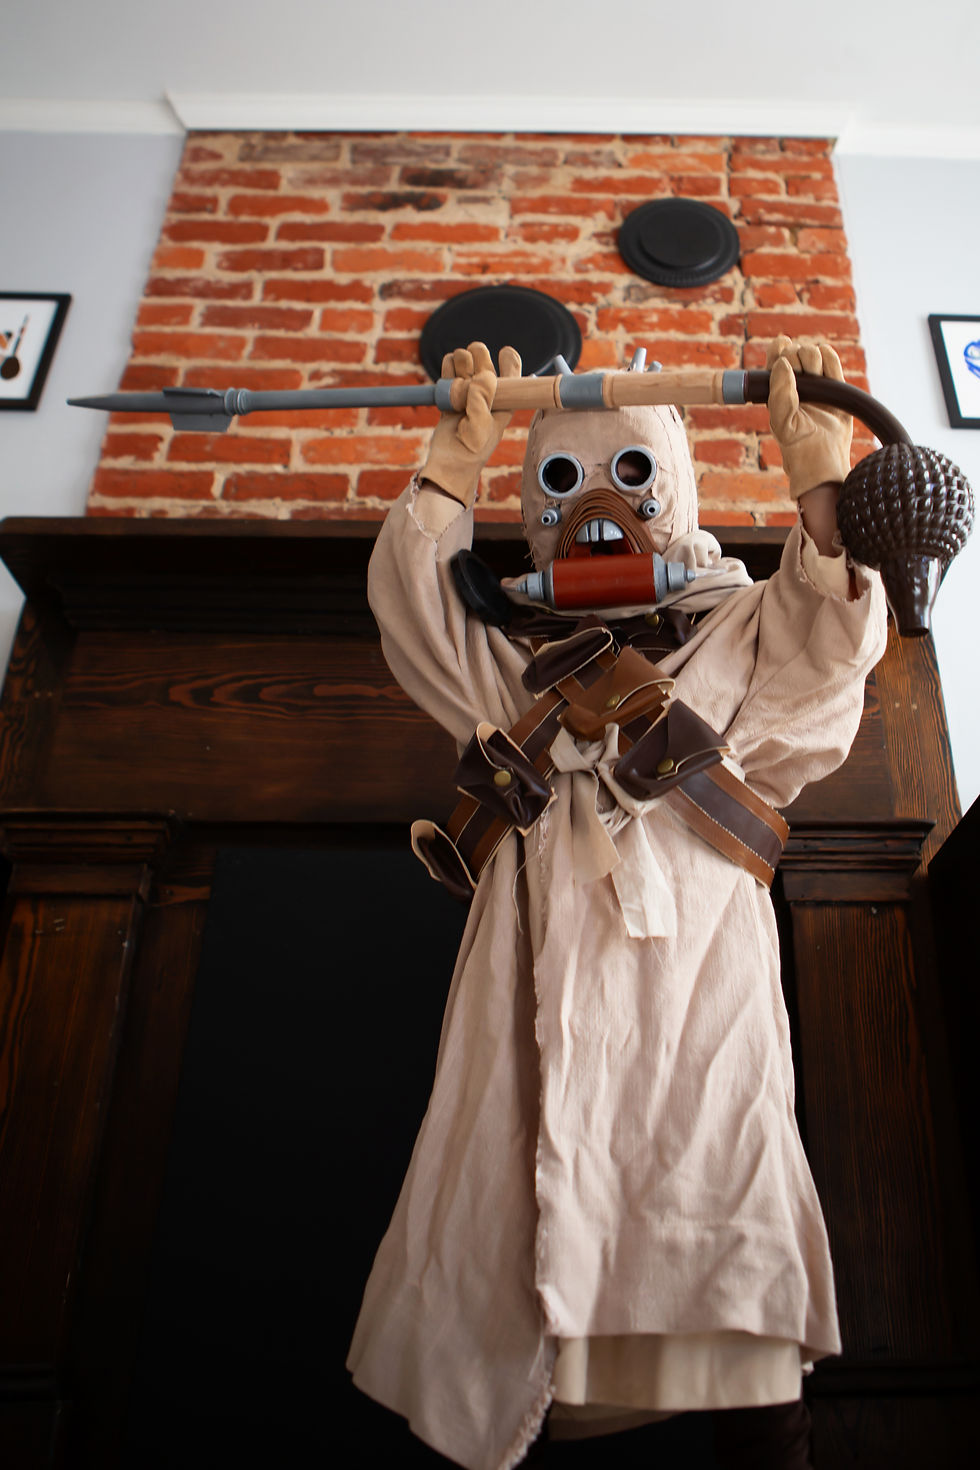
Our son’s love for Tusken Raiders started thanks to The Book of Boba Fett. He didn't see Episode 1, 2 or 3 prior to that... 😬 Jovi was absolutely obsessed with Tusken Raiders... so much so that he wanted an entire costume, by Halloween (he ended up being a ghost by the way 🤦🏼♀️) so the race was on to assemble a child size Tusken Raider costume complete with the full helmet, and of course, the Gaffi Stick. If your kid happens to like Tusken Raiders too, this is how you can make a Gaffi Stick.
by Ryan Kolb
This is truly where my wife wanted me to begin the blog of our Star Wars journey. Back when I was researching Tusken Raider masks, I found digital downloads for, and pre-made buildable, gaffi sticks. In either event, it did not make sense to 3D print, then build/finish a gaffi, nor purchase a pre-made buildable gaffi and (still have to) finish it myself. So I set out on building one on my (son’s) own from things I could get easily: PVC piping, spray paint, caulk, massage roller ball, bicycle handlebar grips, basters (yes, as in food basters), and wallpaper smoothers. If you are not aware of what a gaffi is, I would compare it to a mace.
I started with the stick itself, being this is for a child, I thought PVC piping would work great, it is light, durable, and cheap. I had an initial idea of using a 3/4" x 2’ pipe with a reducer coupling to 1/2" x 2’ pipe and then adding a 90 degree curved PVC conduit pipe. I purchased those parts, plus a few 3/4" coupling; however, I could not easily find the right reducer. The gaffi has couplings between sections like the spear or grips.
I started painting and after experimenting with the 3/4", I realized the stick would be very long with the two straight pipes, curved pipe, and spear attachment. Granted, I could have done some cutting, but that became unnecessary after the realization. Therefore, I decided on using only the curved pipe and the 1/2" x 2’ pipe, in conjunction with the spear. I stayed with the 3/4" couplings I had already purchased. Basically because I was lazy and didn’t want to go back out and get 1/2" spacers/couplings.
Here is a cut of Boba Fett building his gaffi in The Book of Boba Fett. Since I made the mistake of not fully documenting my building process (despite making several points of note in my head for the need to document), this might help give visual to my process.
Parts (explanation):
1/2" x 2’ pipe - for straight pipe
90 degree curved PVC conduit pipe - for curved pipe
Massage roller ball - for the weighted “ball” end
Basters (2) - for the spear
Baster bulb for the pointed piece on the weighted end (with the massage roller)
Bicycle handlebar grips - for the handles
Wallpaper smoothers (2) - for blades attached to the spear
3/4" coupling (2-3) - between grips, and gaffi sections
Spray paint
Caulk for seams
Tools:
Hacksaw
Caulk gun
Super glue
3/4" hole cutter (drill bit)
Utility knife/box cutter
Super glue
Duct tape
Gaffi Stick, Creating and Finalizing:
Once I had all my materials, and tested results, I began to build with intent.
Step by Step:
Using the hacksaw, cut the wallpaper smoothers (approximately 3” along the top edge and approximately 4” at the widest surface width).
I used the blunted smoothed handle portion so that the “blade” edges were flat; this is the top edge.
I also sanded the cut edges
Using the hacksaw, cut plastic cap off one side of the massage roller
Cut as close to the cap as possible and on a straight edge; further down you will be replacing the cap
If possible, remove the remaining portion of the cap tubing from inside of the hollow massage roller tube (not necessary)
Here is where I am glad I bought two basters. The inside of the roller has a ~2” hollow tube. The bulb end of the baster fit perfectly in the tube of the roller. The curved PVC pipe then fit snugly in the baster end, creating a great connection between the massage roller and PVC curved pipe
Place super glue on the bulb (closed) end of one baster bulb and secure inside of the roller
The open connection end should be facing out inside of the open/cut end of the roller
Cut the second baster bulb along the ribbed/raised edge where the bulb begins to taper
Using the product I bought, you can see a solid raised line around the bulb, near the top, this is the edge I cut along.
The two pieces should give you a small dome shaped part and a tapered cone with openings on either end
Super glue the dome shaped baster part to the massage roller, to the exterior cap, so that the piece is convex appearing
Super glue the remaining cut baster bulb piece (open ended cone) to the top of the baster dome
The edge you cut along should fit snugly over the dome
Using the hole cutter, drill the 3/4" hole in the loose massage roller end cap
Slide 90 degree curved PVC pipe through loose end cap
One end of the pipe has a built-in coupler, this end should remain outside of the massage roller
Super glue end of curved PVC to baster bulb inside of massage roller
Super glue end cap back to massage roller
Caulk (clear or brown) the seam where the massage roller end cap meets the PVC
Either color is fine as it will be painted later
Slide baster tube onto one end of straight PVC pipe
It will naturally stop due to the taper of the baster tube
Note/mark where the baster tube overlaps the PVC
Consider only the overlap after the ribbed rings near the top of the baster tube
Cut the PVC, lengthwise, with three (3) evenly spaced cuts
Do not cut lower than the mark for the baster’s ribbed rings
Width of cuts to match the thickness of the bottom of the wallpaper smoother/blades
Slide baster tube onto one end of straight PVC pipe where you made the cuts
Mark the three cuts (from the PVC) on the baster tube
Cut the baster where you marked the PVC cuts
Length of cut should be same length as the bottom edge of cut wallpaper smoother
May need to add length where overlap did not occur
This allows the smoothers/”blades” to be notched inside of the baster
Width of cuts to match the thickness of the bottom of the wallpaper smoother/blades
Place wallpaper smoother blades into the baster tube
This is a dry-test
The notches should help keep in place
Slide baster tube onto straight PVC pipe
Ideally, the cuts will align with the recessed wallpaper smoother blades and “lock” into place
Make adjustments if necessary
Remove the baster tube and super glue edges of wallpaper smoother blades, returning the blades to their slots
Super glue straight PVC pipe or baster tube opening, and slide baster tube onto PVC
Caulk (clear) the baster tube end to the straight PVC pipe
Personal choice, I placed a little caulk in the tip opening of the baster tube
Cut one PVC coupling in “half”
I made two cuts just slightly off center as there is a ribbed ring on the interior
This was to remove the inner ring and keep the coupling balanced (for later placement)
Spray paint silver:
PVC straight piece
Couplings
Baster tube
Wallpaper smoother “blades”
Spray paint brown:
Curved PVC pipe
Massage roller
Baster bulb
After paint dries, connect curved PVC pipe to straight PVC pipe
Connect on opposite end of the cuts
Mark the straight pipe where the curved pipe ends
My curved PVC did not have a “straight” or “flat” edge so I needed to mark the deepest part of the connection
Slide one handlebar grip on the straight PVC pipe
Slide to the middle
Slide the uncut coupling onto straight PVC pipe
This will go between handlebar grips, so slide on end where the PVC pipes will connect
Slide second handlebar grip onto pipe
Sandwiching the uncut coupling between grips
Slide one cut coupling onto straight PVC pipe
Onto the uncut end of the straight PVC pipe
Where the PVC contact point is marked (at its deepest), wrap several layers of duct tape to straight PVC pipe
Do not make tape width wider than the coupling
Place super glue on duct tape and slide coupling into place
Slide handlebar grip up to the affixed (glued) coupling
Wrap several layers of duct tape for the middle (uncut) coupling
The tape should abutt the handlebar grip which is “in place”
Do not make tape width wider than the coupling
Repeat Step 33 with the uncut coupling
Repeat Step 34 with the second handlebar grip
This should be the grip closest to the cut end of the straight PVC pipe
Repeat Step 35 for the remaining cut coupling
Do not make tape width wider than the coupling
Repeat Step 33 for the remaining cut coupling
Caulk (clear) the end coupling to the straight PVC shaft
Super glue the curved PVC pipe to the straight PVC pipe
Caulk (brown) the gap between the PVC connection point
As previously mentioned, my curbed PVC did not have a “straight” or “flat” edge
The caulk filled the gap between the coupling and the curved PVC pipe fitting
Tape (cover) handlebars
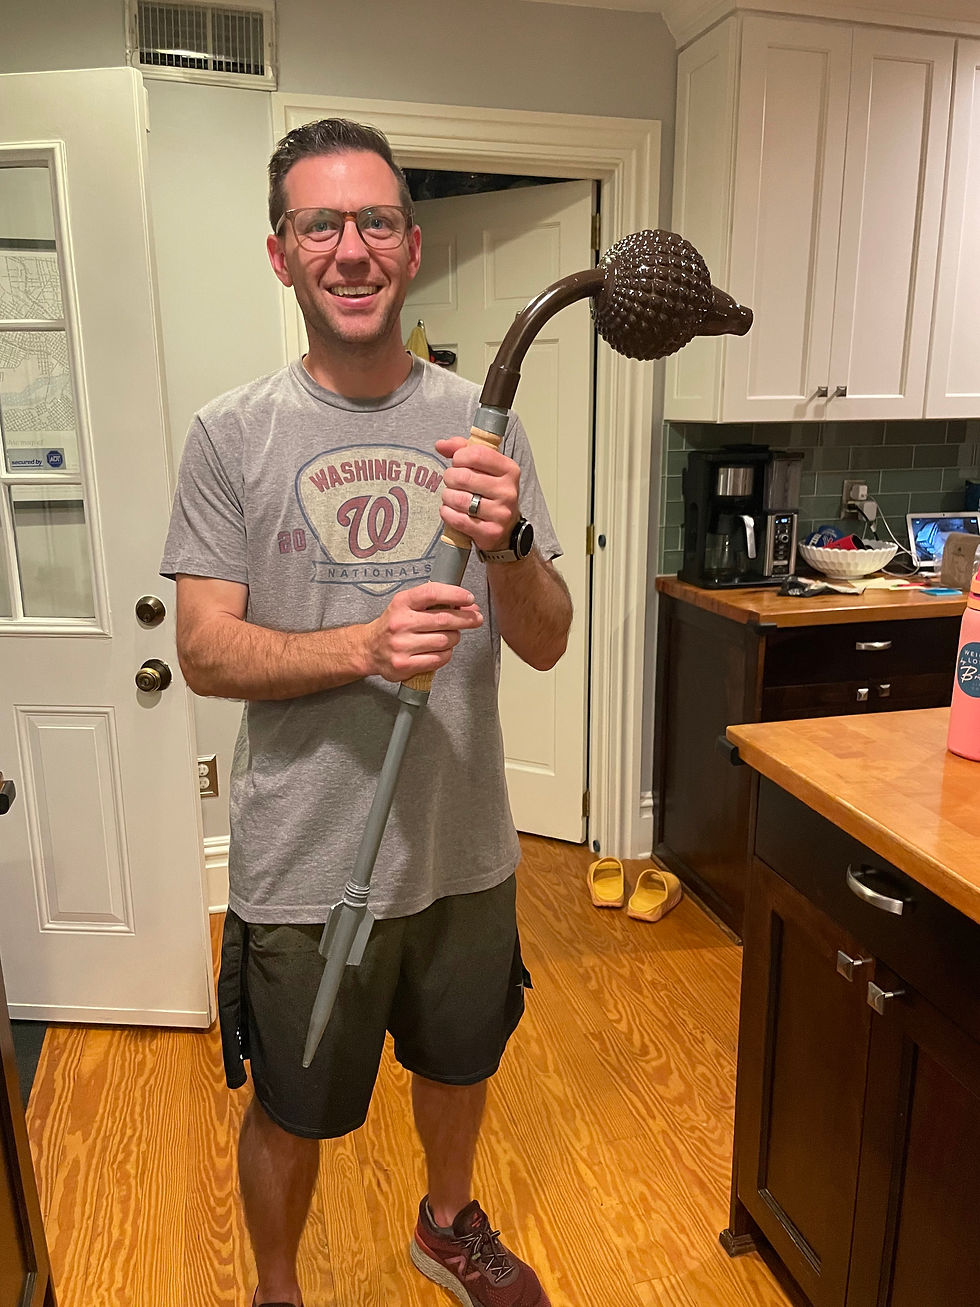
If needed, spray paint in appropriate colors the gaffi stick
After touch-up paint dries, clear coat the entire gaffi stick to protect paint colors
Remove tape from handlebars once clear coat dries
Enjoy!
Want even more?


Comments